Blueberries, blueberries and more blueberries

BBerry Pie

Blueberries are my favorite fruit. I buy them fresh, frozen and dried to eat as a snack or with my morning yogurt. A few years ago I was at the grocery store looking at a high-priced package of the fresh berries, contemplating if they were worth it. A nice older gentlemen leaned over next to me and quietly said, “You know, you can grow those.” I laughed and said that I probably should.

That next spring, I bought four bushes from a local nursery and planted them. Three thrived and the fourth succumbed to an ant colony that I still can’t seem to get rid of. I didn’t expect berries that first year, but thought I’d get a few the second. I saw the flowers bloom, but no fruit. The third year, I picked about a handful and was pretty disappointed. I planted three more bushes of another variety because I had read that planting multiple types together is a good idea. I just can’t remember why.

Last year the first three bushes were big, beautiful and full of flowers, and a little later had green berries. I watched the berries dwindle over the passing weeks. I was stumped until the day I found several of my hens gathered around the bushes. They would fly up, flap their wings and beat at the bushes. When they landed, they quickly began to peck the ground below. My free-to-roam-where-they-please chickens were eating all of my berries before they even had a chance to ripen. No wonder their yolks are a deep orangey-yellow.

This year I wised up and pounded in T-posts and wired goat fencing to completely enclose the bushes. I am pleased to say that as of yet, no chickens have scaled the fence, and the wild bird population hasn’t damaged much.

A week ago I picked 3.5 pounds of berries from those first three bushes. Last weekend, my son picked 8 more. There are still ripening berries to be picked.

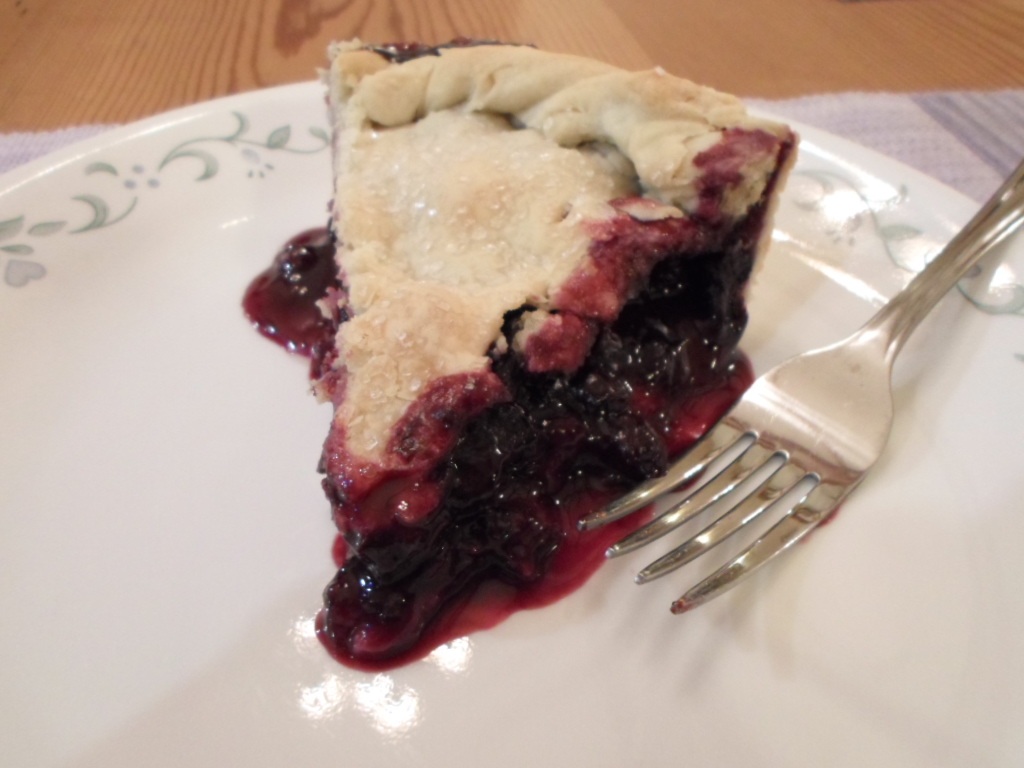
I froze a gallon bag and I also made a large blueberry pie. It was so large I ended up cooking it in a casserole dish.

Blueberry Pie
6 c. blueberries, rinsed and dried
1 c. sugar
1/3 c. flour
1 tsp. Kosher salt
1 tsp. fine lemon zest
1 Tbsp. freshly squeezed lemon juice
2 Tbsp. cold butter, cubed

In a large bowl, stir together the blueberries, sugar, flour, salt and lemon zest. Let sit while preparing the pie crust (recipe to follow).

Refrigerate the dough for at least 30 minutes. Then place on a well-floured surface. Cut the dough in half and roll out the bottom pie shell first. Place dough in pie pan (or casserole dish) being careful to fill the pan without stretching the dough.

Pour the blueberry mixture into the shell. Drop cubes of butter evenly on top of the fruit and drizzle on the lemon juice. Then roll out the top shell. Drape over the pan and tear away extra dough, leaving 1/2 to 1 inch all around. Seal the top and the bottom shells together as you prefer. I like to gently twist and tuck the dough all around. When it comes out of the oven, the edge resembles a rope circling the pie.

I like to brush butter over the top and sprinkle with sugar. Then bake in a 375-degree oven for 20 minutes. If the crust is browning too quickly, put foil over the edges and cook for another 25 minutes. I checked my pie at that point and decided to add another 10 minutes. It probably needed more time because it was so large. When I pulled it from the oven, it was golden brown and the juices were bubbly.

Pie Dough
3 c. flour
1 Tbsp. sugar
1 tsp. Kosher salt
2 sticks cold unsalted butter, cubed
1/2 cup ice water

In a food processor, pulse the flour, sugar and salt a few times to combine. Then add really cold cubes of butter. Pulse until the mixture looks crumbly – about 12 times. Then drizzle in cold water while continuing to pulse until the dough clumps together. Drop the dough on a floured surface and gently press together to form a ball. Cover with plastic wrap and place in the fridge to rest.

We’ll have the rest of the berries for breakfasts and snacks. But I also really enjoy them in a spinach salad. Adding fruit to greens perks them up and can be a nice change.

Spinach and Berry Salad
5-6 c. fresh spinach, cleaned and torn
1/4 c. olive oil
1/8 c. balsamic vinegar
1/2 Tbsp. honey
Salt and freshly cracked black pepper, to taste
1 c. strawberries, cleaned and halved
1 c. blueberries, rinsed and dried
1 c. pecans

Place spinach in a large bowl. Whisk together olive oil, balsamic vinegar and honey. Pour over spinach and sprinkle with salt and pepper. Toss the spinach with the dressing. Top the salad with strawberries, blueberries and pecans. Shaved pieces of Parmesan cheese also make a nice salty-nutty addition.

*** Quotes from Julia Child ***
“A party without cake is just a meeting.”
“The only time to eat diet food is while you’re waiting for the steak to cook.”
“If you’re afraid of butter, use cream.”
“I think every woman should have a blowtorch.”

Swedish Meatballs

Swedish Meatballs

Every year I plant a large garden. I usually order my seeds in February and when they come in, I sort them by those that will be directly sown into the soil and those that I’ll start in pots in the greenhouse for transplanting later. Of those seeds for transplanting, I sort by the number of weeks recommended to start before transplanting. It’s not real complicated; it just takes planning.

With the rainy weather, I’ve delayed transplanting and I’ve not planted any of the direct-sow seeds. My garden is too soggy to till by tractor or with the hand tiller, so last Saturday I used a broadfork to loosen the soil. (The joke is that a broadfork is a fork powered by a broad, budda-budda-ching – enough poorly executed slapstick.) It took about 30-45 minutes to turn up each row; another 30 minutes to further loosen the soil and remove weeds by hand; and finally prepare mounds for planting.

Although it is slow going, I have planted most of the tomatoes and the spaghetti squash started from seed. In fact, I had just planted the last squash when large rain drops started to fall. By the time I loaded the cart with tools, the rain was coming down hard. I felt a sense of accomplishment at having finally started planting. Hopefully those plants won’t drown and rot in the ground.

I still have more squash, eggplant, okra and peppers that need transplanting. I have even more to directly sow, but beginning feels good.

While the rain pounded down outside, I started dinner and was thankful to be safe, dry and warm inside. One of my husband’s favorite dinners is Swedish meatballs and it seemed to be the perfect comfort-food choice to end the day.

Swedish Meatballs
3 Tbsp. olive oil, divided
1 onion, small diced
2 cloves garlic, minced
1-1/2 pound ground beef
1 pound ground pork
3/4 c. breadcrumbs (I prefer Panko)
2 eggs
1/4 tsp. ground allspice
1/4 tsp. ground nutmeg
1/2 Tbsp. Kosher salt
1 tsp. black pepper

Gravy:
5 Tbsp. butter
1/2 c. all-purpose flour
5 c. beef broth
1 c. sour cream
Salt and pepper, to taste
3 Tbsp. fresh parsley, chopped

Heat 1 Tbsp. olive oil in a large heavy-bottomed skillet over medium heat. Cook onion and garlic until the onions become translucent. In a large bowl, combine beef, pork, breadcrumbs, eggs, allspice, nutmeg, cooked garlic and onion, salt and pepper. Mix well until all the ingredients are combined. Roll meatballs that are about 1-1/2 inches in diameter. I counted 28 meatballs rolled.

Add remaining olive oil to the skillet. Cook the meatballs in batches, allowing plenty of room to roll them around and brown all sides. Remove and let drain on a paper towel-lined plate.

Drain the grease from the skillet and wipe clean with a paper towel. To make the gravy, melt butter in the skillet. Whisk flour into the butter and cook until lightly brown. Gradually stir in the beef broth continuing to whisk until slightly thickened. Reduce heat and add the meatballs.

Cover and simmer for about 20 minutes. During that time, cook egg noodles, rice or potatoes to serve with the meatballs and gravy. Check on the meatballs occasionally while they simmer and stir.

Turn off the heat and move the meatballs to the side of the skillet. Whisk in the sour cream and gently stir the contents to combine. Work carefully so the meatballs don’t fall apart. Garnish with chopped parsley and serve.

I love fresh green peas, but frozen are a close second. I microwaved a bag of frozen peas and served them with the meatballs and gravy over egg noodles. We really enjoyed dinner and had leftovers for lunches. And the rain continued to fall.

Sunday on our way to church, we saw three men fishing for catfish on the bridge at Elm Creek. I’ve seen people fishing at the bridge on FM 514, but never far upstream on our little road. Fishing must have been pretty good too because they showed us a really large catfish they had just caught. When life gives you lemons, make lemonade.

More Comfort – Vegetable Stew and Meatball Casserole

Last weekend we moved 50 baby chicks, now seven weeks old, from their two 300-gallon tubs into the new coop. What a relief that was. They now have plenty of room to grow. Sometimes when you introduce new chicks into an existing group, they don’t get along. This time there must have been so much excitement seeing their new digs that they didn’t seem to notice that half the chickens were strangers.

Working on the coop in the cold weather was a challenge. We wore lots of layers and kept moving to stay warm. I made a quick vegetable stew for dinner on Saturday, letting it simmer on the stove while we enjoyed the warmth from the fireplace.

Vegetable Stew

Vegetable Stew
1 large onion, chopped
3 carrots, chopped
3 ribs celery, chopped
2 Tbsp. olive oil
2 bay leaves
1/2 tsp. fennel seeds, crushed
2 cloves garlic minced
6 cups vegetable, beef or chicken broth
1 can tomato bits
2 sweet potatoes, cubed
1-1/2 c. pearled barley
Small bag frozen green peas
Salt and pepper, to taste

Sauté onions, carrots and celery in olive oil with a pinch of salt and pepper until tender. Add bay leaves, fennel and garlic, cooking about 3 more minutes.

Add broth, tomatoes and potatoes and bring to a boil. Add the barley and reduce the heat. Let the stew simmer for about 15 minutes or until the sweet potatoes are fork-tender. Add the peas and cook about 4 minutes more until the peas are warm. Taste and adjust seasonings if necessary.

Of course the best meals are usually those cooked by someone else. Our son made a really tasty meatball casserole one night last week. He found it at myrecipes.com. It tasted just like a meatball sub sandwich, only better.

Meatball Casserole
1 loaf French bread, sliced
8 ozs. cream cheese, softened
1/2 c. mayonnaise
1 tsp. Italian seasoning
1/4 tsp. pepper
2 c. shredded mozzarella cheese, divided
1 lb. frozen meatballs, thawed
28-oz. jar pasta sauce
1 c. water.

Arrange bread slices in a single layer in an ungreased 13×9″ casserole pan. Combine cream cheese, mayonnaise and seasonings; spread over bread slices. Sprinkle with half the mozzarella; set aside.

Gently mix together meatballs, pasta sauce and water; spoon over cheese. Sprinkle the remaining cheese over the top. Bake uncovered at 350 degrees for 30 minutes.

Since we didn’t have Italian seasoning, I know he substituted equal parts dried oregano, thyme and basil. He also decided to use 1/2 c. red wine and 1/2 c. water instead of just water. He had bread left over after building the casserole so while that cooked, he buttered the leftover bread, sprinkled on garlic salt and toasted it. Then he made a salad. It was a wonderful dinner with plenty of calories, so practice good portion control.

Sally’s First Snow Day

Sally's first snow
Sally had never seen snow before.
“Eww, it is cold and wet!”
But Aunt Deborah said, “Sally, we need to let the chickens out of the coop.”

Are you sure
“Oh, are you sure? The house is so warm and dry. Maybe we should head back.”
But Aunt Deborah said, “No Sally, let’s get our chores done first.”

Smart chickens
When the coop door was opened, no chickens came out. Aunt Deborah checked and they were all safe and dry with plenty of food and water. “Hmmmm,” Sally said, “smart chickens.”

Let's go back
Great, let’s hurry back home now.
Yes Sally, it is time to go home.

But wait...
“But wait,” Sally said. “What was that?”

got something
Come on Sally, we’re going home.
But Sally said, “I think I smell something. I must investigate!”

The hound comes through
Sally can’t help it. It may be cold and wet, but the hound is on the scent.

Comfort dinners – Quick Meatballs and Slow-cooked Turkey Chili

Turkey chili

Last Wednesday, my husband and I moved 50 baby chicks from the house to the barn. They were five weeks old and far too large and smelly to stay in my house. We split them between two 110-gallon troughs with food, water, heat and netting on the top to keep them in. The move was stressful for David, me and the chicks. Luckily for me, it was Ben’s night to make dinner.

Meatballs and Mushroom Gravy
1.5 lbs. lean ground meat
10 saltine crackers, crushed
2 eggs
2 Tbsp. Worchestershire Sauce
1 Tbsp. A-1 Steak Sauce
1 tsp. each salt and pepper
2 cans cream of mushroom soup
1 can milk
1/2 c. sliced black olives

In a large bowl mix ingredients beginning with ground meat through salt and pepper. Form about 20 small balls. Cook the meatballs in a large skillet over medium-high heat. Ben said he added a little oil to the pan to keep the meat from sticking. When browned on all sides, remove the meatballs from the pan and drain on a paper towel-lined plate.

Pour the mushroom soup and milk into the pan and whisk until blended. Add the meatballs and black olives to the pan, cover, reduce heat to low and cook for about 20 minutes. Make pasta or rice to serve with the meatballs and sauce.

We all enjoyed the dinner. Since I’m still watching what I eat and slowly adding back healthy carbs, I had about a half cup of noodles and two meatballs.

Saturday we framed the walls that will enlarge our existing coop. Soon those 50 chicks will need somewhere to go. I helped by cutting 2x4s to the required lengths, giving my opinion and most importantly, providing what David calls the “Jesse James.” That is, I “hold it up” while David nails it.

Sunday morning I started a slow cooker chili recipe inspired by an article in an old Southern Living. I am always looking for new recipes that fit my diet. I followed that recipe fairly closely, but recommend a few changes – see comments in parenthesis.

Smoky Turkey and Sweet Potato Chili
1.5 lbs. ground turkey
2 Tbsp. olive oil
1 Tbsp. tomato paste
1 cup Mexican beer (or chicken stock)
1 cup dried pinto beans
1-1/2 Tbsp. chopped chipotle peppers in adobo sauce
1 Tbsp. kosher salt
2 tsp. ground cumin
1 tsp. smoked paprika
1/2 tsp. freshly cracked black pepper
2 bell peppers, coarsely chopped
8 ozs. dried lima beans
1 large onion, chopped
5 cups unsalted chicken stock (I added a mix of V-8 juice and stock, plus more stock when needed)
2-1/2 c. sweet potatoes, cubed

In a large skillet, cook turkey with salt and pepper in oil over medium-high heat. Don’t worry if it sticks, but keep cooking until you actually see it sear brown in places. Transfer meat to a slow cooker.

Add tomato paste to the skillet and cook for about 30 seconds. Then add the beer bringing it to a boil while stirring to loosen the bits from the bottom of the pan. (Perhaps because it was so early in the morning, I chose to substitute the beer with chicken stock.) After about 3 minutes, add the contents to the slow cooker.

Except for the sweet potatoes, add the remaining ingredients to the slow cooker. Cook on high for 7 hours. (I checked the liquid twice during that time and added a cup of stock each time.) Then stir in sweet potatoes and cook 1 hour more until potatoes are tender.

Serve garnished with a dollop of yogurt or sour cream, chopped cilantro, green onions, radish slices and jalapeños. The chipotle peppers in that recipe really added heat and may be skipped. The smoky paprika provides enough kick on its own if milder chili is preferred.

Butter Beans and Bread with Compound Butter

Butter Beans

Most people don’t need to be told to save the bone from a ham. I searched the freezers twice and dug around in the back of the fridge – no bone. My husband tried to convince me that I’d already used it in something, but I would have remembered that.

It really seemed odd to me that it could have disappeared. So I asked my son. Yep, he threw it out. I explained to him that one never ever throws out a ham bone.

Luckily while exploring the freezers, I found one from a few months ago. Thank goodness, because I had been dreaming about beautiful butter beans and they’re not the same without a ham bone.

I’m also thankful that I inadvertently disguised the ham broth in an old yogurt container, or that probably would have been thrown out too. Wonderfully on Sunday as the rain drizzled, I had the beans cooking on the stove.

Butter Beans
1 lb. dried large lima beans
6 cups ham stock and water
1 ham bone
2 cloves garlic, minced
2 bay leaves
salt and pepper, to taste

I sorted through the beans, covered them with water in a large pot and brought all to a boil. Then turned off the heat, covered with a lid and let soak for at least an hour. Strain the beans and rinse.

Return to the pot and add stock and enough water to equal 6 cups. Throw in the ham bone, garlic and bay leaves. Bring to a boil and then reduce the heat to a simmer.

Keep an eye on the pot so it doesn’t boil over, but otherwise in about 1 to 1-1/2 hours, they’ll be ready. Add pepper, but definitely taste before adding salt. The ham stock is usually salty and the beans may not need more.

Such a simple dinner was great served with toasted bread. I had made some sourdough so I toasted it and slathered it with compound butter. That’s butter whipped with herbs or other complimentary ingredients. The butter is great for melting over meats, vegetables or just smearing on bread.

The combinations are limited only to the imagination, but common versions are garlic and parsley, blue cheese and chives or brown sugar and chopped walnuts. I made sage and roasted garlic for Thanksgiving and still had some in the freezer.

Compound Butter
2 sticks unsalted butter, cubed
1-1/2 Tbsp. olive oil
1Tbsp. sage, chopped
1 head garlic, roasted
1 pinch salt

In a food processor, combine olive oil, sage and garlic squeezed from the skins. Then add butter and whip until combined. Scoop onto waxed paper. Using a dough scraper, shape into a log, wrapping the waxed paper around it. Twist the ends and place in a freezer bag. Freeze the butter for later use.

Then as needed, slice off discs of butter. They are decorative and tasty. They also make great gifts for friends who love to cook.
Using leftover items (ham bone, stock and other kitchen staples) and store-bought beans, dinner for the three of us was $1.28. Sweet!

Macerated Cherry Tomatoes

Macerated Tomatoes

I spent every second possible last week outside. I love that weather and while taking stock of work still needing to be completed, I wandered into my weedy tired garden. What a blessing to find ripe red cherry tomatoes. After tasting one, I found it sweet and flavorful. There’s nothing like home-grown tomatoes.

I picked all I could hold in the hem of my T-shirt and made a mental note to get back out there before the frost this week. I’m sure I will have a bushel of green tomatoes and peppers to pick.

After an exquisite day outside, I wanted something light and quick for dinner, and why not use some of that produce I picked?

Macerated Cherry Tomatoes
4 c. cherry tomatoes, halved
1 small onion, small diced
1/2 green pepper, small diced
1 glove garlic, mined
2 Tbsp. capers,
1/3 cup olive oil
1/3 cup balsamic vinegar
Salt and pepper to taste

Mix all ingredients together and let sit on the countertop for at least 1 hour. If you have the time, five hours is even better. Marinating in this way brings out the natural sweet juices of the vegetables.

I cooked 12 ozs. of angel hair pasta in salted water, drained and returned to the pot. Stirring in a little olive oil will keep the noodles from sticking while the hot pot reduces excess water.

Since I marinated my vegetables in a large serving bowl, I just dumped the pasta on top and tossed the everything together along with 1 cup of Parmesan cheese.

Fresh basil was still available in the garden, so I chopped some for garnish. I served that dish at just above room temperature along with buttered toasted sourdough bread.

The macerated cherry tomatoes are also good on toasted bread or bruschetta. Store any leftovers in the refrigerator and the next day they also spruce up a simple green salad, no other dressing necessary.

Mushroom and Spinach Quiche

Quiche

I have 27 laying hens. Mostly they are Americaunas or “Easter-egg” chickens, and I have a few Barred Rocks and Buff Orpingtons too. The girls and rooster Henry are pasture-raised. That means they are free to roam wherever they want looking for bugs and other tasty treats. It makes for healthier richer eggs, but it also makes every day an Easter egg hunt. Some of them feel that a tall patch of grass near a bush is a safer place to lay than in the nesting boxes.

I usually sell their eggs and the girls support themselves. We eat the eggs that I won’t sell because they have a peck-mark crack or some are so large they don’t fit into a carton. Those always have two yolks. I had a few saved up and decided to make a quiche.

I wanted to try a new pie crust recipe using wheat flour and olive oil instead of the usual all-purpose flour and shortening. It turned out well and is great for a savory dish like the quiche, but it would not be right for a dessert pie.

Mushroom and Spinach Quiche
For the crust:
1 c. wheat flour plus a little extra
1⁄4 tsp. kosher salt
1⁄4 tsp. black pepper
1⁄4 tsp. baking powder
1⁄4 c. extra-virgin olive oil
3 Tbsp. ice water

Combine dry ingredients in a food processor and pulse a couple of times to mix. Measure the olive oil and add the ice water to it. I usually fill another cup with ice and pour water over it. I let it sit a couple of minutes until it is really cold and then I carefully skim the cold water off the top.

With the processor on, slowly pour in the oil and water mixture. Process until the dough starts forming a ball. Turn the dough out onto a lightly floured surface and knead for about a minute. Press the dough into a disk and wrap in plastic wrap. Let it chill for 20 minutes.

Then roll out the dough. Fit it into a pie pan lightly coated with cooking spray. My dough was a little crumbly and separated at the edges, but I pressed it together in the pan. With a fork, I pierced the crust multiple times on the bottom and sides. Bake in a 425º oven for 10-12 minutes or until the edges are golden. Let it cool while you make the filling.

For the filling:
3 slices bacon
1⁄4 c. onions, chopped
8 oz. mushrooms, sliced
2 tsp. fresh thyme
2 c. packed fresh spinach
1 c. low-fat milk
1/3 c. fat-free Half-and-Half
4 large eggs
3 oz. Swiss cheese, grated
Salt and pepper

Cook bacon until crisp. I cooked the entire package using 3 slices for the quiche, 3 slices for a salad and the remaining saved for another meal. Reserve 1⁄4 cup of the bacon fat for later to be used in a salad dressing and crumble the bacon for the quiche and the salad.

Cook the onions, mushrooms and thyme in the pan with the residual bacon grease – about 10 minutes. Stir in the spinach and cook until it wilts. Then remove from heat.

Process the milk, Half-and-Half, eggs and a pinch each of salt and pepper in the food processor until smooth. Arrange half the Swiss cheese over the crust, layer the spinach-mushroom mixture and bacon over that and top with remaining cheese. Pour the milk mixture over all.

Bake at 350º for 45 minutes until the filling is set. I usually place strips of foil along the perimeter of the pie after about 15-20 minutes. That will keep the exposed crust from getting too brown. Let stand 10 minutes before cutting and serving.

Warm Bacon Dressing
1⁄4 c. warm bacon fat
1⁄4 c. red wine vinegar
1 tsp. sugar
1 tsp. Dijon mustard
Kosher salt and black pepper

Whisk all ingredients together tasting and adding a pinch of pepper and salt if needed. Crumble three slices of bacon and tear a head of Romaine lettuce into bite-sized pieces. Toss with the dressing and serve.

Grilled Okra with Lemony-Basil Dip

Grilled Okra

Last weekend we harvested grapes for friends in Tyler and we had a harvest of our own. The green beetles have really been voracious eaters this year. If we had picked a week earlier, I’m sure we’d have harvested twice the grapes. It felt like we were racing the beetles to get to the fruit first.

Meager as the harvest was, it is always a relief to have it finished. Now I can catch up on all the other work that needs to be done. I can work on my garden again and get it ready for fall. I can tend to my flowerbeds that have overgrown with weeds. I’m also dreaming of cooler days that are perhaps a little less hectic.

Enough dreaming, so I kicked off fermentation on my red grapes. Punching down the cap at least twice each day adds air into the must (very early wine with skins, seeds, etc.) which helps the yeast do its job. Also keeping the skins mixed into the must brings out more color and flavor. By this time next week, we’ll have begun the malolactic fermentation, converting malic acid in the must to lactic acid and thereby reducing the acidity.

It seems that while some things may be winding down, others are just getting started. Clearly okra is doing well in the heat. We pick almost every day and have to throw out okra that is too large and woody because we either skipped a day or didn’t see it. I have many recipes for okra, but stumbled across one for an hors d’oeuvres or appetizer.

Can you imagine serving okra and a dip at a party or even to the gang watching football? The recipe brings out the snazzy side of okra and dresses it up with a lemony-basil dip.

Lemony-Basil Dip
32-oz. container yogurt, strained
1/3 cup fresh basil, chopped
1 lemon zested and juiced
3 cloves garlic, minced
1⁄2 tsp. sugar
1-1/2 tsp. salt
1⁄4 tsp. pepper

Place several layers of cheese cloth (or a large coffee filter) in a strainer and place over a bowl. Pour yogurt in and let it strain in the refrigerator for up to 24 hours. Then add the remaining ingredients, stir well and chill before serving.

Grilled Okra
2 lbs. small okra, cleaned
1-1/2 or 2 Tbsp. olive oil
1 tsp. salt
1/4 tsp. pepper

Toss the okra in olive oil, salt and pepper. Grill over medium-high heat for about 3 minutes on each side. Let cool and serve with chilled lemony-basil dip.

I love snacking on fried okra and the grilled version tastes just as good, and it’s better for you. The dip is low-calorie, tasty and fresh. I would certainly serve this at a get-together instead of fatty fried chips and dip. Hmmm, is that why no one comes over?

Black-eyed, purple-hull and pink-eyed peas

purplehull peas

Black-eyed peas are often eaten on New Year’s Day to bring good luck. They are usually served with greens and cornbread, representing money and gold. The protein-rich legumes in that pea family are a good source of soluble fiber, and contain vital nutrients of B vitamins, vitamin E and iron.

I grow purple-hull peas, a variety of the black-eyed, in my garden. I don’t remember how many seeds I planted, but I sowed 8 rows, 4 feet apart. I thought that would keep a path for easier picking, but I was wrong. They are so large they meet in the middle of each path. I can’t keep up with picking or shelling.

I sold peas last weekend at the Sunrise Market in Sulphur Springs, gave a few pounds to family members, put away nine pounds in my freezer and had them for dinner on Sunday night. Driving by the garden Monday morning, I saw purple pods everywhere, needing to be picked. Plant those peas and your family will not go hungry!

I like to sauté chopped onion, green pepper and garlic while browning about 4 slices of chopped bacon. Then I add peas to the pot and cover with water. Adding a couple of bay leaves to anything cooked low and slow is also a good idea. Once the water boils, I turn the heat down to a simmer, cover and cook for about an hour. I don’t like the peas to over-cook, so I start tasting them about 45 minutes into the cooking process, while adding salt and pepper.

Sunday’s dinner also included oven-roasted okra and sweet potatoes, both from the garden. With 3 pounds of cooked peas, I planned on leftovers. Those are wonderful in a marinated salad. The great thing about the salad is there are many variations and a cook can substitute with ingredients on-hand.

Marinated Pea Salad
4 cups cooked black-eyed or purple-hull peas
4 slices bacon, cooked and crumbled
1⁄2 cup red wine vinegar
1⁄2 cup olive oil
1⁄2 medium red onion, chopped
1 red bell pepper, chopped
3 green onions chopped
2 jalapeños, minced
1 bunch parsley, chopped
2 garlic cloves, minced
1⁄2 Tbsp. Creole seasoning
Salt and pepper to taste

Mix all ingredients together and refrigerate for at least 4 hours; however overnight is best. Remove from the refrigerator, stir and let sit 30 minutes before serving. Sometimes I add chopped avocado, fried okra, tomatoes and/or cilantro as a garnish.

With pea production at its height, I’m in need of a pea sheller. I just don’t have hours to commit to that process. In fact, the only time I sit that long might be during a Sunday morning service. I’m pretty sure some would frown upon my shelling peas during the sermon. If you have a sheller and are looking to get rid of it, I’m interested.