Salsa recipe

Salsa

I use the freshest ingredients possible when cooking for my family. I try to steer clear of prepared foods as they usually contain preservatives and chemicals. A friend of mine said, “If your child can’t pronounce the ingredient, you probably don’t need to be eating it.” That may not be too far off, but I prefer to consider it as eating closer to the field or the source.

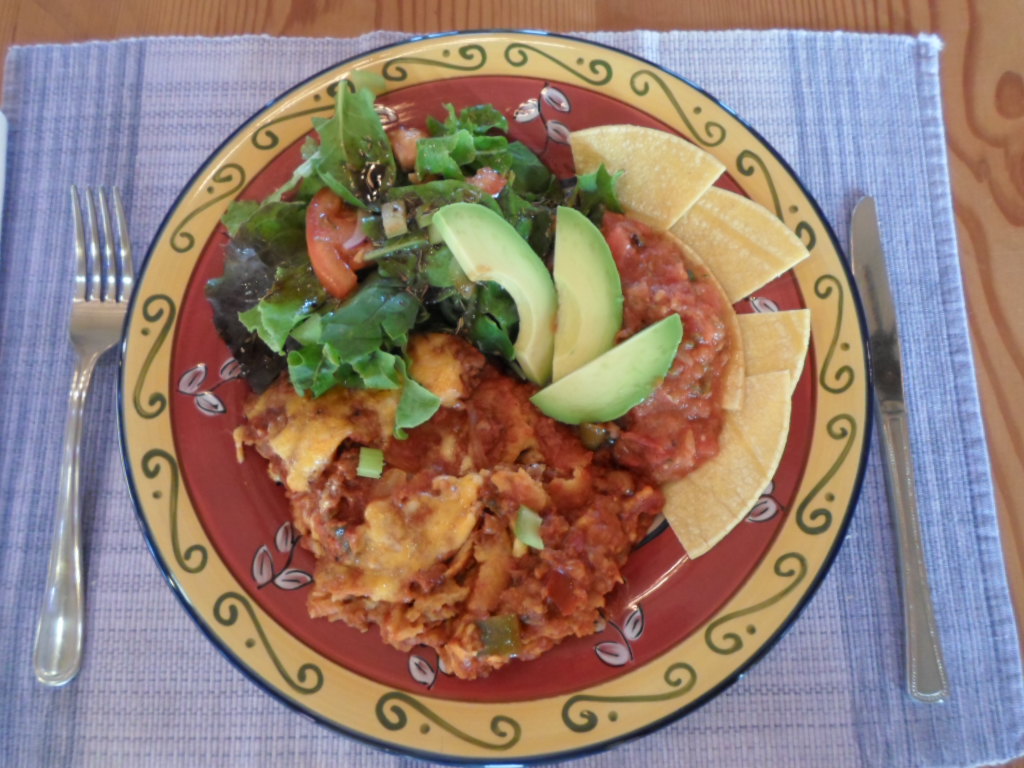
I’ve really been looking forward to making an enchilada casserole and can’t imagine serving it without fresh salsa. Unfortunately, my tomato crop is behind. They are big, but they are still too green. So I picked some up at the farmers’ market – at least it’s close to the field if not my own.

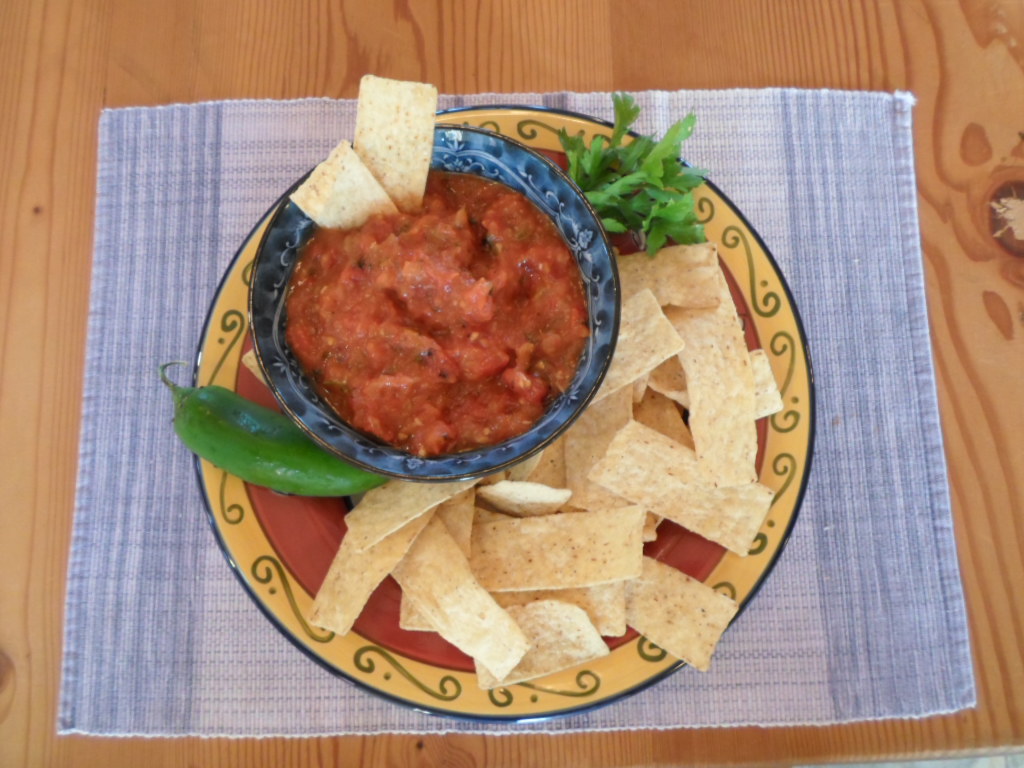
This easy salsa recipe is a winner with chips or served with a meal. Start by preheating your oven to 415 degrees. Quarter about 8 medium-sized tomatoes, 2 medium-sized onions and 3 jalapeño peppers. Spread over a baking sheet and add 4 chopped garlic gloves and salt and pepper.

Drizzle olive oil over all and stir until everything is coated. Place in the oven and roast for 20 minutes. Take the pan out of the oven and stir the ingredients again to ensure even cooking. Put back in the oven for 15 minutes more. Remove pan from oven and let cool while you chop fresh cilantro and juice a lemon.

Pull out the food processor and scoop the cooled roasted vegetables into it. It is important to let the vegetables cool until they can be easily handled – do not process hot ingredients. Pulse a few times. I like for the vegetables to be recognizable, but continue to pulse until everything is well incorporated and it has a good consistency for salsa.

Pour into a serving bowl; add cilantro, lemon juice and any salt or pepper that is needed. Note – the last time I made this salsa, the jalapeños were incredibly hot. They overpowered the tomatoes. I added a 15 oz. can of petite diced tomatoes, since I didn’t have any more fresh. They balanced out the heat and looked appealing too.

Enchilada Casserole Dinner

Enchilada dinner

This casserole is easy to make and easy to freeze. I usually make two – one for dinner and one for later. You can use a store-bought sauce, but they are usually too thin. If you have time, I recommend making the sauce.

Sauce:
Mince a small onion and sauté in 1 tablespoon of olive oil with a pinch of salt. Add a small can of tomato paste (about 3 tablespoons). Mince and add a garlic clove with a teaspoon of cumin and thyme. Add 2 cups chicken stock and a tablespoon of chili powder. Stir until everything is incorporated. Add a 28-oz can crushed tomatoes. Add chicken stock as necessary to achieve the proper consistency for a sauce. Cover and let simmer at least 25 minutes.

Meat mixture:
Chop a medium-sized onion and sauté it in olive oil with a pinch of salt and black pepper. Dice a bell pepper and add it to the pan. Mince three garlic cloves and add them. I use a pound of ground beef and a pound of beef chorizo. The chorizo adds great flavor, but also add a teaspoon of the following: cumin, thyme and oregano.
Stir and break down the beef into smaller bits. When the meat is no longer pink, add two diced tomatoes or a 15-oz can of petite diced tomatoes. Add about a half cup of chicken or beef stock and let everything simmer on low while grating the cheese.

Preheat the oven to 350 degrees. Shred enough cheddar and Monterey jack cheese to have a total of 4 cups. Cut about 20-24 corn tortillas in half.

Assemble the casseroles:
Pull out two casserole pans. If you are freezing one, I recommend using a foil baking pan or a freezer safe pan that can later be thawed and placed in the oven. Spread about a half-cup of sauce on the bottom of each casserole dish. Layer the tortillas over this to cover the bottom of each dish. Combine the remaining sauce and meat mixture. Spoon a quarter of the sauce and meat mixture over the tortillas in each dish. Sprinkle a cup of cheese over both. Repeat the layers, using up all the meat, cheese and sauce. Bake for 25 to 30 minutes. The other casserole can be covered with foil and tightly sealed. Then slide the sealed casserole into a 3-quart freezer bag, labeling and dating the bag before freezing.

The casserole in the oven is done when the cheese is melted and the sauce is bubbling. Let the casserole sit while you prepare a simple tossed salad.
Serve the casserole with the side salad, chips and salsa.

Dinner or Kaiser roll recipe

Dinner-Kaiser Rolls

Dinner Roll Recipe for bread-makers or small KitchenAid-type mixers

1 ½ cups water
3 tsp. active dry yeast
4 tsp. sugar
4 ½ cups break flour
1 tsp. salt
1 tbls. Nonfat dry milk
1 tbls. Shortening
1 ½ tbls. Butter
1 egg

Mix yeast and sugar together in warm water. Let sit while the yeast begins to get foamy. Add 2 cups of bread flour to yeast mixture and begin stirring. Then add all the remaining ingredients and continue stirring.

If you are using a KitchenAid-type mixer, use the dough hook or paddle. Continue on a lower setting until a nice ball of dough forms. Let it run for about 8 minutes and add flour slowly if the dough is too sticky. The moisture in the air impacts the dough, so you’ll use more flour on humid or rainy days. Then cover the dough in the bowl with a towel and let rise about 1 hour until doubled in size.

If you are using the bread-maker, select the dough-only setting and let it run its course.

Dump the dough out on a floured work surface and punch it down.

For dinner rolls, form mounds that depending on the pan you are using, will fill the area by half. Be sure to grease the pan first. I made three balls a little smaller than a ping-pong ball and placed them in a muffin tin.

For Kaiser rolls, I rolled out a long rope of dough and tied a loose knot leaving long ends. Then I took each end and wrapped it around the opening of the knot. Pinch the two ends together under the roll and set on a greased cooking sheet.

dough

Cover the rolls with a cloth and let rise until doubled in size. Brush the rolls with a wash made of an egg-white and about 2 tbls. milk. I sprinkled sesame seeds on top of my Kaiser rolls. Cook in a 400 degree oven for 12-15 minutes or until golden brown. Enjoy!

Pulled pork sandwich with a side of slaw

Pulled Pork Sandwich

Last Sunday morning while I was drinking coffee on the back porch with my husband, it started to rain. The soothing sound of rain makes me want to slow-cook something and play in the kitchen. Since I needed to work on a dinner roll recipe, I decided to slow-cook a pork shoulder in the crock pot at the same time. On the way back from Sulphur Springs around noon, I stopped at the store and picked up a large pork shoulder and barbeque sauce. If I don’t make my own sauce, I like Sweet Baby Ray’s.

At home I realized the pork shoulder had over an inch of fat and that’s more than I like, so I trimmed it, washed the shoulder and patted it dry. I gathered the seasonings to make a quick rub. I flipped the shoulder over so I was dealing with the bottom and I layered on garlic salt, cracked black pepper, dried oregano, chili powder and onion powder. I gave that a gentle massage and dropped its herbed-bottom side down in the crock pot. The side with the fat layer should always be on top.

Then I layered the same ingredients on the top of the shoulder. I drizzled the top with the barbeque sauce – not too much just enough to add a little moisture and flavor. The shoulder will give off plenty of juice while it’s slowly cooking. I set my crock pot on high and worked on the dinner roll recipe.

In 6-8 hours the meat should be done enough to fall off the bones. Mine took 6 since my crock pot cooks at a higher heat than most. I turned the crock to warm. Then I used two forks and began separating the meat from the bones and pulling the pork into small pieces.

For dinner I served pulled pork sandwiches on Kaiser rolls with leftover slaw from last week’s dinner recipe. It turned out to be a hot sunny afternoon, but by 7:00 that evening the back porch was cool with the ceiling fans going and the sandwiches were just right.

The dinner roll recipe worked out great, but it makes about 75 rolls. I only needed 36 so I made Kaiser rolls with the leftover dough. Personally I think those rolls made the sandwiches be over-the-top.

Spicy fish tacos with slaw and marinated squash salad

Fish Tacos

I try to serve my family fish at least once a week. That’s more difficult than it sounds because my husband thinks fish should be shredded, pressed into sticks, coated with batter and deep-fried. This fish taco recipe is quicker than preheating the oven and cooking a box of fish sticks pulled from the freezer section of the grocery store. It calls for a white fish like tilapia, but catfish fillets work too. Placed on warm corn tortillas with cabbage slaw and a side of squash salad, this dish is not only colorful, but super tasty.

Most gardens are beginning to overflow with yellow and zucchini squash. Pick them when they are small and tender for this easy marinated side salad that goes great with the tacos. Clean two yellow and two zucchini squash. Since they are young and tender, you should not need to peel them. Cut them in half lengthwise and slice across the halves into bite-sized pieces.

Pick a small sweet onion or use both the white and green parts of a couple of scallions and slice thinly. Gather a few sprigs of thyme from your herb garden and strip the leaves from the stem. Whisk together the juice from 2 lemons, 3 tablespoons of olive oil, thyme leaves and a pinch of salt and pepper. Toss this mixture with the squash and onions and set aside to marinate while you make the tacos.

Wash and dry the fish fillets. Heat a couple of tablespoons of olive oil in a nonstick skillet on medium-high. Sprinkle a little rub (recipe below) on each side of the fish and gently place in the hot oil. The fish will cook quickly, so keep an eye on it. With a spatula, lift the edge of the fillets and when nicely browned on the bottom, flip over to brown the other side. The fish is done when the middle is completely white and is easily flaked with a fork. Turn off the heat and remove the fish, placing on a paper-towel-lined platter. Let rest while you prepare the slaw.

Core half a head of cabbage and shred. Now for the fun part, you can choose the next ingredients based on what you were able to find fresh at the farmer’s market or in the produce aisle. Choose 3 from any of the following: radishes, any color onion, celery, carrots, jicama, apple, etc. Keep it simple, and the ratio is about 2 parts cabbage to 1 part all the other freshly shredded ingredients combined.

Create a dressing by whisking together ½ cup plain yogurt, ½ cup mayonnaise, 2 tablespoons cider vinegar, 1 teaspoon Dijon mustard, 2 teaspoons honey and ¼ teaspoon celery seed. Mix with the shredded vegetables until all are coated.

Now it’s time to plate the dinner. An adult serving consists of a small-sized fish fillet separated into pieces and laid on two warm corn tortillas with slaw on top. Serve a helping of marinated squash with the two tacos and enjoy.

Spicy rub recipe:
1 Tbsp. Paprika
2 tsp. Black Pepper
1-1/2 Tbsp. Salt
1 tsp. Garlic powder
1 tsp. Cayenne pepper (cut in half for less heat)
1 tsp. dried oregano
1 tsp. dried thyme
Mix all ingredients together and keep in an air tight container. This spicy rub is great on fish, pork or chicken.

Family Dinner – Pork loin, wild rice and Swiss chard

Now is the perfect time to start paying attention to what you eat and from where it comes. Fresh produce abounds and is so good for you. I try to focus on ways to use fresh produce, lean meats, whole grains and healthy fats to make wholesome family dinners. Visit the farmers’ market or produce aisle as your fist stop when buying groceries. Purchase fresh vegetables and fruits and then pick up frozen foods or boxed meals as a last choice.

This week, I gathered Swiss chard and onions from my garden to make a healthy side to go with lean grilled pork chops and wild rice. I spent 30 minutes in the kitchen with an additional 10 minutes to let the meat rest while I set the table and gathered the family.

I purchased lean center-cut pork loin(about 1 inch thick) for my family dinner. Lightly drizzle the loins in olive oil and sprinkle with salt, pepper and dried thyme. Then let them sit for about 10 minutes while heating the outdoor grill – you can cook them in the oven for 25-30 minutes at 375 degrees, but the grill gives it a wonderful smoky taste. Definitely go for the grill at medium-high heat for 6-8 minutes on each side. Let them rest, covered with foil, for at least 10 minutes before serving.

My family loves Uncle Ben’s Wild Rice – fast cook recipe. It is quick, easy to make and taste great. It is also a healthy choice when looking for the grain-element in your dinner. Just follow the directions on the box.

Clean the chard – or spinach if you prefer –by removing the stems and wash by floating in water, allowing the sand to settle to the bottom. Drain the greens and set aside. You may need to wash the greens a couple of times making sure to wash off all the sand. I usually wash greens on my back porch in a large bowl and throw the gritty water on my plants.

In a skillet at medium-high heat, sauté 1 chopped onion in 2 tablespoons of olive oil. Add salt and pepper for the onions to absorb while cooking. Add a pinch of crushed red pepper (another pinch if you like it hot) and 2-3 chopped garlic cloves. Continue to sauté, but don’t let the garlic burn.

Add the greens all at once. The pan should be very full, but as you toss with tongs, the greens will wilt and slowly reduce. Turn off the heat once the greens have all been coated with the oil, garlic and red pepper. They won’t look done at that point, but put a lid on the pan and let it sit and steam while the rest of dinner cooks.

To serve, lay a small bed of wild rice on the plate. The portion should be no larger than the size of your fist. Then arrange the grilled pork partially over the rice and place the wilted greens next to them. Sit down together as a family, give thanks for the bountiful meal, talk about the day and enjoy dinner.

If dessert is even necessary, consider grilling apple slices drizzled with a light vegetable oil. Grill just long enough to see nice grill marks. Mix yogurt with a little maple syrup, cinnamon and nutmeg. Add fat-free Half-and-Half if the yogurt mixture is too thick. Then drizzle over the grilled apples and serve.

Shopping list:
Onions
Garlic
Greens – Spinach or Swiss chard
Apples
Wild Rice – quick cook recipe
Yogurt
Olive oil
Maple syrup
Pork chops – center cut
Spices – salt, pepper, cinnamon, nutmeg, thyme and crushed red pepper

Leftover pork is great the next night on a salad. Serve over a bed of romaine lettuce and fresh spinach. Chop a tomato, grill a sweet onion and asparagus from the garden and place on the greens. Slice the leftover pork loin thinly and scatter on top. Dress the salad with 1 part red wine vinegar (or balsamic vinegar) and 1 part olive oil. Add a pinch of salt and pepper. Grated parmesan cheese or crumbled feta cheese is wonderful sprinkled on top.